


When you want to know how to test an alternator, you need a clear process and reliable methods. Testing your oem alternator gives you more than just a pass or fail result. Many DIYers find that real-world testing helps when factory information is missing. If you check your oem alternator under different loads and speeds, you can spot big changes in efficiency—sometimes from 40% up to 89%. You also discover how to match your alternator's output to your vehicle’s needs. With basic tools, you can test an alternator at home and make sure your car runs at its best.
Key Takeaways
Look for warning lights on the dashboard, like the battery symbol. These lights can show alternator problems early.
Use the right tools, like a multimeter and load tester. These tools help you check voltage and amperage safely.
Check belts and wires first. Loose or broken parts can give wrong test results.
Test the battery voltage with the engine off and on. A good alternator keeps voltage between 13.6 and 14.7 volts.
If tests show low or changing voltage, check the connections and belts. You may need a pro to fix or change the alternator.
Signs of Failure

Warning Lights
The first sign of alternator trouble is often on your dashboard. The battery charge warning light means the alternator is not charging the battery. This light looks like a small battery symbol. Most people know what this light means. About 89.7% of drivers get it right.
Indicator Light Type | Meaning | Correct Interpretation (%) | Wrong Interpretation (%) | Don't Know (%) |
|---|---|---|---|---|
Battery Charge Warning Light | Indicates alternator is not charging battery | 89.7 | 9.7 | 0.6 |
Do not ignore this light if it comes on. Some people wait too long to fix it. This can cause bigger problems later. Sometimes, the check engine light will also turn on. Both lights mean you should check your alternator soon. If you see these lights, you might already have other alternator problems.
Electrical Issues
You may notice electrical problems if your alternator is failing. These problems can include:
Headlights that flicker or get dim because of unstable voltage.
Electrical parts like the radio or dashboard lights work sometimes but not always.
The engine may stall or sputter because it does not get enough power.
The instrument cluster may stop working, like the speedometer.
The battery may drain and not keep a charge.
You can use a digital volt-ohm meter to check the voltage. A good alternator shows between 13.8 and 15.3 volts when the car is idling. If the voltage drops a lot or is not steady, your alternator may be bad. Sometimes, bad wiring or corrosion causes voltage drops. You should also check for fluid leaks or worn parts. These things can hurt the alternator over time.
Preparation Steps
Tools Needed
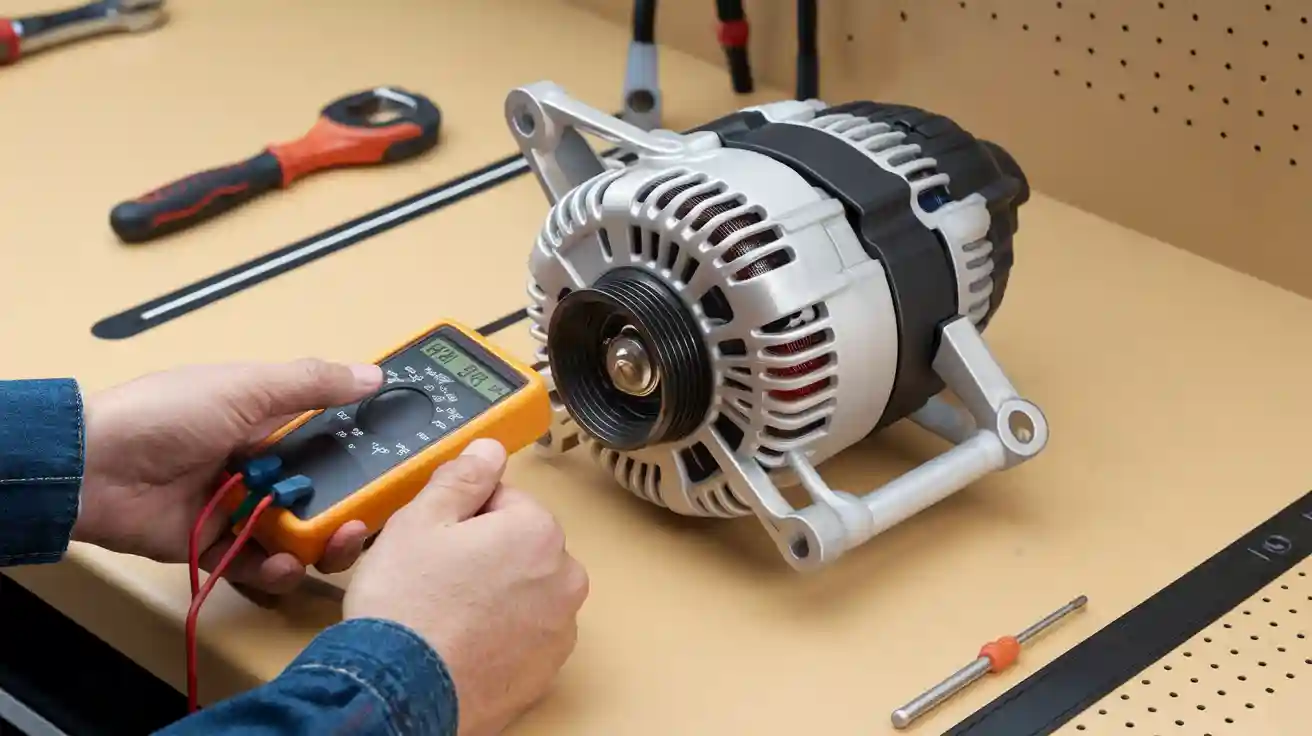
You need the right tools before you test an alternator. A multimeter and a load tester are very important. You also need safety gear like gloves and safety glasses. These keep you safe while you work. Many people use a digital multimeter to check voltage. A load tester helps you see how the alternator works under stress. Some testers plug into the 12V socket and use LED lights to show results. The table below shows common tool features and what they do:
Feature | Specification |
|---|---|
Load Capacity | |
Dimensions (Load Tester) | 7.2 x 3.7 x 12.4 in |
Weight (Load Tester) | 2.65 lbs |
Operating Voltage | 12-volt system |
Indicators | |
Usage | Plug into 12V cigarette lighter socket |
Design | Compact, glove box size |
Warranty | 1 Year |
Tip: Always read your tool's manual first. This helps you avoid mistakes when testing the alternator.
Inspect Belts and Wiring
Start by looking closely at the belts and wiring. Make sure everything looks good before you test anything. Use this checklist to help you:
Make sure the belts are tight. Loose belts can slip and lose power.
Look at all wiring for damage or rust.
Check if barrel leads have tight insulation.
Look at grounding straps and fuses for problems.
Fix any problems you find before you test the alternator. Good connections help you get the right readings. Bad connections can give you wrong results. Always start with these steps to save time and avoid mistakes.
How to Test an Alternator
Battery Voltage Test
Start by checking your battery voltage. This helps you see if your battery and charging system work right. Use a multimeter for this test. First, turn off the car engine. Set the multimeter to DC voltage between 15 and 20 volts. Put the leads on the battery terminals. Write down the voltage you see. A good battery should show about 12.5 to 12.8 volts. Next, start the engine. Check the battery voltage again. A working oem alternator should make the voltage go up to 13.6 to 14.7 volts. Turn on the headlights, radio, and fan. See if the voltage stays above 13 volts. This means your alternator can handle more load.
Tip: If the voltage drops below 13 volts when the engine is running, your alternator might be weak or there could be a wiring problem.
Manuals say a good alternator keeps battery voltage between 13.9 and 14.8 volts. The best voltage is 14.2 volts. Even with everything on, the voltage should not go below 13 volts. If you see low voltage, check the alternator output terminal next.
OEM Alternator Voltage Test
You can test the alternator by measuring voltage at its output terminal. Put the positive lead of the multimeter on the red terminal of the alternator. Put the negative lead on a metal part that is grounded. You should see a voltage between 13.6 and 14.6 volts. This test shows if the oem alternator works, even if the battery voltage is low.
Many people use the voltmeter in the dashboard or a scan tool to check voltage. These readings are usually the same as the battery voltage. The voltage is often around 13.6 to 13.8 volts when the engine is running. This is a fast way to check alternator voltage without opening the hood.
If the voltage is too high (over 15 volts) or too low (under 13 volts), check the alternator belt, wiring, and voltage regulator. Sometimes, a bad voltage regulator makes the alternator overcharge or undercharge the battery.
Load and Amperage Test
You need to know if your oem alternator can handle real electrical loads. A load tester helps you measure the real output current. Connect the load tester as the manual says. Start the engine and turn on all big electrical parts.
Here is a table showing normal amperage for different alternator models:
Alternator Model | Output Voltage | Amperage (Cold, 1000-3000 RPM) | Amperage (Hot, 1000-3000 RPM) |
|---|---|---|---|
12V 70A | 13.6-14.8V | 68-78A | 56-66A |
12V 250A | 13.6-14.8V | 130-290A | 101-221A |
The voltage should stay steady while you test the alternator under load. If the amperage drops a lot or the voltage goes below 13 volts, your alternator may not be strong enough for your car. Remember, alternator ratings show the most current at a certain speed, but real output changes with engine speed and heat.
Additional Checks
You can get better results by doing a few more tests:
Check the alternator warning bulb and its socket before starting the engine. If the bulb is bad, the alternator will not charge, even if it works.
Plug a voltmeter into the 12V port to watch for voltage changes while driving. This can help you find problems like bad diodes or a weak voltage regulator.
Listen for strange noises from the alternator using a rubber hose. Weird sounds may mean worn bearings or other problems.
Test slip ring resistance with a multimeter. You should see about 4 ohms and no connection to ground.
Unplug the voltage regulator connector to see if the alternator output voltage changes. If nothing changes, the regulator may be bad.
Note: Some people disconnect the battery while the engine runs to check the alternator, but this can hurt your alternator or electronics. Only do this in emergencies.
Watching voltage all the time helps you find problems that only happen sometimes, like dim lights or charging issues that do not show up in a quick test. Doing these extra checks gives you a full look at your alternator's health.
Next Steps
If your test shows problems, you should fix them soon. Start with these steps:
Check if the battery is charged. A weak battery can make your test wrong.
Look at all cables and connections to see if they are tight or rusty.
Listen for strange sounds like whining or grinding from the alternator.
Watch for things like dim headlights or dashboard lights that flicker.
You can also try these tips to find the problem:
Use an oscilloscope to look for smooth ripple patterns. This can help you find diode or stator problems.
Turn on lights and fans to put a load on the alternator. See if it keeps up.
If you can, compare your results to a good alternator.
If you find something wrong, fix loose wires or change old parts. If the alternator still does not work, you might need a new one. Always be safe and ask a professional if you are not sure.
You now know how to test your OEM alternator step by step.
Check for warning signs.
Use the right tools.
Test voltage and amperage.
Compare your results to standard values.
If your alternator fails any test, repair or replace it. You can also ask a professional for help. Regular checks keep your car reliable and safe. Stay alert to changes in your vehicle’s electrical system.
FAQ
How often should you test your alternator?
You should test your alternator every 12 months or before long trips. If you notice dim lights or warning signs, check it right away. Regular checks help you avoid sudden breakdowns.
Can you test an alternator without removing it from the car?
Yes, you can test your alternator while it is still in the car. Use a multimeter to check voltage at the battery and alternator terminals. This method saves time and effort.
Do all cars use the same alternator voltage?
No, most cars use 12-volt systems, but some trucks or specialty vehicles use 24 volts. Always check your owner's manual for the correct voltage before testing. Need to know "what is the difference between 12V and 14V alternators", click here.